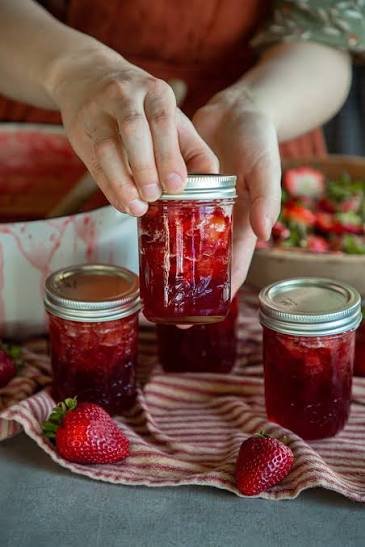
Making your own homemade strawberry jam is one of the most rewarding kitchen projects you can ever try at home. This recipe is all about taking fresh, bright red strawberries and turning them into a sweet, thick, and delicious spread that you can keep in your pantry for a very long time. When you make jam from scratch, you get total control over what goes into your jar, which means you do not have to worry about fake colors, strange chemicals, or artificial preservatives that factory made jams often contain. It is a simple and honest process that uses just a few natural ingredients to highlight the natural beauty of fresh fruit. Whether you are a complete beginner in the kitchen or someone who has been cooking for years, this traditional method of canning strawberry jam will give you incredible confidence. You will learn how simple ingredients like fresh berries, white sugar, and fresh lemon juice work together to create magic in a warm pot. The final result is a glowing red jar full of intense strawberry flavor that completely outperforms anything you can buy at a local grocery store.
People all over the world fall in love with homemade strawberry jam because the taste is infinitely better than store bought varieties. When you open a jar of jam that you canned yourself, you are greeted by a deep fruity smell and a rich taste that tastes like real summer days. Factory made jams often use high fructose corn syrup and extra water, which waters down the true flavor of the berries and makes the jam taste flat and overly sweet. Homemade jam keeps the bright and tangy nature of fresh strawberries intact, giving you a wonderful balance of sweet and tart in every single bite. Another big reason people love making this recipe is the deep sense of accomplishment that comes with it. Watching fresh berries break down into a glossy, bubbling ruby red sauce and then hearing the famous pop sound of the jar lids sealing tight is deeply satisfying. It connects you to traditional ways of preparing food and gives you something tangible and beautiful that you can take pride in every time you open your pantry.
There are so many wonderful reasons to make this recipe, whether you are thinking about taste, warm emotions, or even your overall wellness. From an emotional perspective, making strawberry jam brings back warm memories of family, sunny summer mornings, and cozy weekend breakfasts with loved ones. It is a fantastic project to do when strawberries are in peak season, very cheap, and packed with full flavor at your local farm or market. Making a big batch allows you to preserve that fresh seasonal goodness so you can enjoy the taste of bright summer fruits even in the middle of cold winter months. It also makes for a deeply thoughtful and personal gift for friends, neighbors, and family members during holidays or special events. From a health and fitness perspective, making your own jam allows you to control the sweet levels and avoid harmful additives that ruin healthy eating habits. Fresh strawberries are packed with valuable vitamins, antioxidants, and helpful fiber, making this sweet treat a much better option for your daily breakfast toast or morning oatmeal bowl.
Setting aside time to make canned strawberry jam is also a wonderful way to slow down and enjoy a peaceful day in your kitchen. Cooking can often feel like a stressful chore when you are rushing to throw together a quick weeknight dinner, but canning jam is a slow, rhythmic, and cozy activity. You get to spend time washing bright berries, chopping them into nice pieces, smelling the sweet steam as they cook down on your stove, and carefully pouring the finished jam into clean glass jars. It is a sensory experience that relaxes your mind and fills your entire home with an amazing aroma that stays in the air for hours. Plus, having a good supply of home canned jam saves you money over time and ensures you always have a delicious spread ready for quick snacks, baking projects, or surprise guests. Once you experience the rich flavor and joyful process of canning your own strawberry jam, you will never want to go back to buying commercial jars ever again.
Ingredients You Will Need
To make this classic homemade strawberry jam, you only need a few basic ingredients that you can easily find at any local food market. Getting the measurements right is important because the balance between fruit, sugar, and acid helps the jam set properly without needing added commercial pectin.
-
8 cups of fresh strawberries, hulled and coarsely chopped
-
4 cups of granulated white sugar
-
0.25 cup of fresh lemon juice
-
1 tablespoon of fresh lemon zest
Step by Step Method
Canning strawberry jam is very simple when you follow these easy instructions. Read through all the steps before you start so you feel totally ready.
Preparing Your Tools and Equipment
-
Clean your glass canning jars, new lids, and screw bands in warm water with mild soap.
-
Place a small metal rack inside a large canning pot and fill the pot with enough water to fully submerge your jars later.
-
Put your clean jars into the water bath pot and bring the water to a warm simmer so the jars stay hot until you are ready to fill them.
-
Place two small ceramic plates inside your freezer because you will use them later to test if your jam has set properly.
Preparing the Fresh Fruit
-
Wash all your fresh strawberries thoroughly under cold running water to remove any dirt.
-
Remove the green leafy tops from every strawberry using a small paring knife.
-
Chop the strawberries into small pieces if you like smooth jam, or leave them in larger chunks if you prefer a chunky style spread.
-
Place the chopped strawberries into a large, wide bowl and use a potato masher to crush them gently until they release their natural juices.
Cooking the Strawberry Jam
-
Transfer your crushed strawberries into a large, heavy bottomed pot or stainless steel kettle.
-
Add the white sugar, fresh lemon juice, and lemon zest directly into the pot with the fruit.
-
Stir everything together very well using a long wooden spoon until the sugar begins to dissolve into the red fruit juice.
-
Turn your stove heat to medium high and bring the entire strawberry mixture to a full boiling state, stirring constantly so it does not burn at the bottom.
-
Keep cooking and stirring the jam at a rolling boil for about 15 to 20 minutes as the liquid boils down and becomes thick and shiny.
-
Skim off any light pink foam that floats to the surface using a metal spoon so your final jam looks crystal clear and pretty.
Testing the Jam Thickness
-
Take the pot off the heat for a brief moment to test if the jam is done cooking.
-
Remove one of your cold plates from the freezer and place a small spoonful of hot jam onto the cold plate.
-
Wait about one minute, then push the edge of the jam gently with the tip of your clean finger.
-
If the surface of the jam wrinkles and feels gel like, your jam is fully cooked and ready.
-
If the jam is still runny, put the pot back on the stove and boil for another 3 to 5 minutes before testing again with the second cold plate.
Filling the Jars
-
Use a jar lifter tool to carefully remove one hot glass jar from your pot of boiling water, letting any extra water drain back into the pot.
-
Place a wide mouth funnel on top of the hot jar.
-
Ladle the hot strawberry jam carefully into the jar, leaving a small space of about a quarter inch at the very top.
-
Run a clean plastic utensil along the inside walls of the jar to release any trapped air bubbles.
-
Wipe the top rim of the glass jar with a damp cloth to make sure no sticky jam is left behind.
-
Place a clean metal lid flat on top of the jar and screw the outer metal band on until it is fingertip tight.
Processing the Jars in Water
-
Lower your filled glass jars carefully back into the pot of hot water, making sure the water covers the top of the jars by at least one inch.
-
Place the lid on your large pot and bring the water to a full, rolling boil over high heat.
-
Process the jars in the boiling water for 10 full minutes.
-
Turn off the heat after 10 minutes, remove the pot lid, and let the jars rest in the hot water for 5 additional minutes.
-
Carefully lift the jars out of the water using your jar lifter and place them on a clean kitchen towel on your counter.
-
Let the sealed jars sit completely still for 24 hours without moving or touching them.
-
Listen for a satisfying pop sound from each lid, which signals that your jars have sealed safely and correctly.
Why This Recipe Is Special
This strawberry jam recipe stands out from other methods for many reasons that make it a favorite for home cooks. First of all, it uses the traditional low ingredient approach that relies purely on natural fruit juices, pure sugar, and fresh lemon to create a thick spread. Because you do not need to buy store bought box pectin, the true, unadulterated flavor of the fresh strawberry comes through loud and clear without any artificial gummy texture. Lemon juice plays a double role in this recipe by acting as a natural setting agent while also balancing out the sweet white sugar with a light, refreshing zest.
From a wellness perspective, making your own food allows you to avoid unnecessary chemical additives, artificial colorings, and hidden chemicals that are commonly found in low quality store brands. Fresh strawberries are naturally packed with vitamin C, essential minerals, and helpful fiber that support your immune system and overall digestive wellness. While jam does contain sugar to make it safe for long term storage, preparing it at home ensures you are getting clean nutrition from simple, real ingredients without hidden syrups. The combination of sweet fruit and rich, smooth textures makes this jam an absolute joy to eat on breakfast foods, yogurt bowls, or whole grain snacks.
Extra Tips for Better Taste
-
Choose berries that are fully ripe, dark red, and sweet, but include a few slightly underripe berries because they contain higher natural pectin levels that help the jam set nicely.
-
Always use fresh lemon juice rather than bottled juice because fresh lemon provides a much brighter taste and better natural acid levels.
-
If you like rich flavor combinations, add half a teaspoon of pure vanilla extract or a pinch of ground cinnamon during the final minutes of cooking.
-
Do not try to reduce the sugar amount significantly in this classic recipe because sugar acts as a preservative that keeps the canned jam safe to store on pantry shelves.
-
Keep your cooking pot wide rather than deep because a wider surface area allows water to evaporate faster, resulting in a quicker cook time and brighter red color.
-
Store your processed, sealed jars in a cool, dark, and dry space like a pantry closet to maintain the best color and flavor for up to a whole year.
Final Thoughts
Making your own canned strawberry jam at home is a wonderful culinary journey that brings comfort, great taste, and simple joy into your daily kitchen life. There is nothing quite like opening a fresh jar of bright red jam that you made with your own hands and spreading it generously over a warm piece of toasted bread. This simple recipe proves that you do not need complicated tools or hard to find ingredients to create incredible homemade food that your whole family will love. We hope you enjoy every single step of this fun cooking process, from selecting the freshest berries to hearing that joyful sealing pop of the glass jar lids. Share a jar with someone you care about, enjoy the amazing sweet flavors, and celebrate the timeless art of home canning.
Nutrition Details
Here is an estimated nutrition breakdown for this homemade strawberry jam recipe per standard serving size.
Disclaimer
Everyone’s body is unique, and individual health needs or dietary responses can vary from person to person. The nutrition details and health information provided in this article are meant for general educational purposes only and should not replace professional medical or nutritional advice. If you have specific dietary restrictions, diabetes, or health conditions related to sugar consumption, please consult with a qualified doctor or registered dietitian before adding new sweet preserves to your regular daily meal plans.