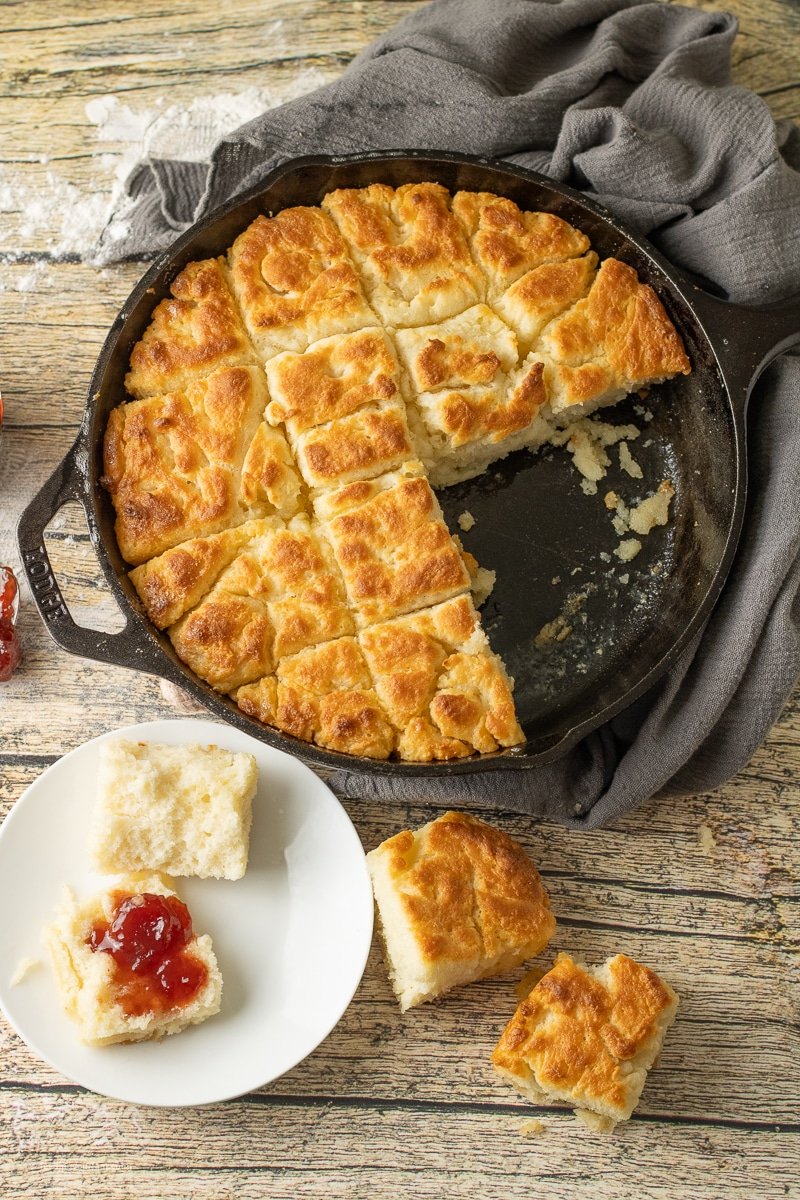
Butter Swim Biscuits are an absolute game changer in the world of home baking. If you have ever felt intimidated by the thought of making fresh bread or traditional biscuits from scratch, this recipe is your ultimate shortcut to success. Unlike traditional biscuits that require you to cut cold butter into flour with precise hand movements, roll out dense dough on a flour covered counter, and use special cutters, this dish turns the whole process upside down in the easiest way imaginable. You simply mix a few basic pantry items together, pour melted butter directly into a baking dish, place the soft dough right on top, cut it into squares, and let the oven do all the hard work. As it bakes, the dough swims in a pool of golden melted butter, creating a crust that is crispy, salty, and savory on the bottom, while keeping the inside unbelievably soft, light, and airy. It is the kind of comfort food that fills your kitchen with a rich, inviting bakery aroma within minutes. Every bite delivers a delightful contrast between the crunchy exterior and the pillowy center, making it a favorite for seasoned bakers and total beginners alike.
People all across the world absolutely adore this recipe because it delivers maximum flavor with minimal effort. In today’s fast paced lifestyle, very few people have hours to spare standing in the kitchen kneading dough, waiting for yeast to rise, or cleaning up messy flour spills from countertops. This simple pan baked treat eliminates all of those frustrating steps while delivering results that taste just as good, if not better, than classic southern style biscuits. It requires zero fancy equipment, meaning you do not need an expensive stand mixer, a pastry blender, or even a rolling pin to achieve perfection. Children and adults alike fall in love with the rich taste and the fun cooking technique, which almost feels like a magical kitchen trick as the dough absorbs the melted butter while baking. Additionally, because the recipe relies on basic ingredients that almost everyone already keeps stocked in their kitchen cupboards, you can satisfy a sudden craving for fresh baked bread at a moment’s notice without having to make a late night run to the grocery store. It is pure, simple comfort on a plate that brings smiles to the table every single time.
There are so many wonderful occasions to make these golden delights, whether you are hosting a big family gathering or simply treating yourself on a quiet morning. They are the ideal addition to a lazy weekend breakfast, pairing beautifully with runny scrambled eggs, crispy strips of bacon, or hot breakfast sausages. If you have a sweet tooth, slathering a warm biscuit with homemade strawberry jam, sweet honey, or cinnamon butter creates a heavenly morning treat that boosts your mood instantly. On busy weeknights, these biscuits serve as the ultimate side dish for cozy dinners, soaking up rich savory gravies, hot chili, beef stew, or creamy tomato soup better than any store bought rolls ever could. Beyond just satisfying your hunger, baking these treats creates a deeply emotional connection through food. The smell of warm butter and toasted flour brings a sense of warmth, nostalgia, and comfort into your home, helping you unwind after a long, stressful day. Even if you are mindfully watching your diet, enjoying a homemade baked treat made from wholesome, simple ingredients is a wonderful way to practice flexible eating without feeling deprived.
What makes this baking adventure even more satisfying is how reliable and forgiving the entire process is for anyone trying it for the first time. Mistakes that usually ruin regular biscuit dough, such as over handling the flour or using butter that is slightly too warm, simply do not happen here because the dough is meant to be wet and soft. You do not have to worry about achieving exact thickness or perfectly round shapes because the baking pan shapes the biscuits for you as they expand. This low stress approach builds confidence for beginners who are often scared of baking with flour and baking powder. Seeing a tray of pale dough transform into a glorious, bubbling, golden brown masterpiece in less than half an hour gives you an incredible sense of achievement. Whether you are cooking a festive holiday dinner for relatives, preparing a simple after school snack for hungry kids, or just looking to enjoy a cozy homemade meal, these buttery delights bring genuine warmth, comfort, and delicious joy to any dining table.
Ingredients You Will Need
To make these delicious, fluffy, and golden biscuits, you only need six simple ingredients. Most of these items are probably already sitting in your kitchen pantry or refrigerator right now. Make sure to measure your ingredients accurately to get the best texture possible.
-
2.5 cups of All Purpose Flour
-
4 teaspoons of Baking Powder
-
1 tablespoon of Granulated White Sugar
-
1.5 teaspoons of Fine Table Salt
-
1.5 cups of Cold Whole Milk or Buttermilk
-
0.5 cup of Unsalted Butter (which equals 1 stick or 8 tablespoons)
Step by Step Method
Making these biscuits is smooth and straightforward. Follow these detailed steps to guarantee a perfect batch every single time you bake.
Step 1: Preheat Your Oven
Before you start mixing any ingredients, set your oven to 450 degrees Fahrenheit (232 degrees Celsius). Preheating is crucial because a hot oven activates the baking powder immediately, ensuring your dough rises high and stays fluffy.
Step 2: Prepare Your Baking Pan
Take an 8 inch by 8 inch square baking dish. Melt your stick of butter completely in a microwave safe bowl. Pour all the melted butter directly into the bottom of the baking dish so it covers the entire surface evenly. Do not worry if it looks like a lot of butter; this is where the recipe gets its name and incredible flavor.
Step 3: Combine the Dry Ingredients
In a large mixing bowl, add the all purpose flour, baking powder, sugar, and fine salt. Whisk everything together thoroughly for about 30 seconds. Whisking ensures that the baking powder and salt are evenly distributed throughout the flour, which prevents flat spots and uneven rising later.
Step 4: Add the Milk
Pour the cold milk or buttermilk into the dry flour mixture. Use a wooden spoon or a rubber spatula to gently stir everything together until a soft, wet dough forms. Be careful not to overmix the dough. Stir just until the dry flour disappears into the liquid. Overmixing can make the final texture tough instead of light and fluffy.
Step 5: Transfer the Dough to the Pan
Gently spoon the wet dough directly into the center of your baking dish, right on top of the pool of melted butter. Use your spatula to spread the dough gently toward the edges of the dish until it covers the bottom evenly. You will see the melted butter rise up around the sides of the dough, which is exactly what you want to see.
Step 6: Cut the Dough into Squares
Before placing the pan in the oven, take a sharp knife or a butter knife and slice through the dough to form nine equal squares. Slice straight down in a grid pattern (3 rows by 3 rows). You do not need to separate the pieces; simply scoring the dough allows the butter to seep deep into the center crevices while baking, and it makes separating the biscuits after cooking super easy.
Step 7: Bake to Golden Perfection
Place the baking dish into the preheated oven on the middle rack. Bake for 20 to 25 minutes. Keep an eye on the oven during the last few minutes. You are looking for a deep golden brown color on top, and the edges should look crispy and bubbling.
Step 8: Cool and Serve Warm
Remove the baking dish from the oven using thick oven mitts. Place it on a heat safe counter or wire rack and let it sit for about 5 to 10 minutes. During this brief cooling period, the biscuits will absorb any remaining melted butter in the pan, making them extra moist. Re cut along your original lines, scoop out the squares, and serve them hot.
Why This Recipe Is Special
This dish holds a truly special place in home cooking because it reimagines a classic staple with pure simplicity, making top tier baking accessible to absolutely everyone. Traditional recipes often require complex baking skills like cutting cold fat into flour using special tools, chilling the mixture repeatedly, and rolling out dough to precise thicknesses. This streamlined method removes all those stressful barriers, allowing anyone to produce bakery level results on their very first attempt without any special culinary training or expensive gadgets.
From a culinary perspective, the flavor profile and texture contrast are unmatched. Cooking the dough directly inside a pool of hot fat browns the bottom and sides to a deep, savory crunch, creating a crust reminiscent of fried bread. Meanwhile, the top rises freely into a light, airy, and delicate cloud. As the liquid inside boils off during baking, the steam creates tiny air pockets that lock in moisture, ensuring that the interior never dries out.
There are also subtle health advantages to making your own baked goods at home instead of buying pre packaged options from the supermarket. When you bake from scratch, you have complete control over every single ingredient entering your body. Commercial store bought rolls often contain artificial preservatives, hydrogenated oils, trans fats, high fructose corn syrup, and chemical dough conditioners to prolong shelf life. This homemade version relies entirely on simple, recognizable, real food ingredients. You can also easily substitute traditional ingredients for dietary needs, such as using milk alternatives or whole grain flour blends to suit your lifestyle choices.
Extra Tips for Better Taste
While the basic recipe is already delicious, you can easily take the flavor to the next level with a few creative twists and pro tips.
1. Use Real Buttermilk
While regular whole milk works fine, real buttermilk adds a subtle tanginess that elevates the overall flavor profile. The natural acid in buttermilk also reacts with the baking powder, producing a lighter, softer, and more tender crumb structure inside.
2. Add Fresh Herbs and Garlic
Transform these into savory dinner rolls by mixing half a teaspoon of garlic powder, a teaspoon of dried parsley, and a pinch of black pepper into your dry flour mixture. You can also brush the tops with garlic butter right after they come out of the oven for a garlic knot style experience.
3. Mix in Shredded Cheese
For a rich cheese lover’s treat, gently fold one cup of freshly shredded sharp cheddar cheese into the dough right before adding the milk. The cheese melts into tiny pockets throughout the bread as it bakes, delivering gooey savory goodness in every single bite.
4. Sprinkle Coarse Salt on Top
Just before placing your pan into the oven, sprinkle a light pinch of flaky sea salt or coarse kosher salt across the top of the dough. This adds a delightful crunch and highlights the sweet, rich flavor of the butter.
5. Make a Sweet Honey Version
If you want a sweeter treat for afternoon tea or dessert, increase the sugar in the dry dough mix to two tablespoons. As soon as the pan comes out of the oven, drizzle two tablespoons of warm honey directly over the hot crust so it soaks in deeply.
Nutrition Details
Below is an estimated nutritional breakdown for this recipe. Keep in mind that exact nutrition values can vary slightly based on the specific brand of flour, butter, and milk you choose to use in your kitchen.
Recipe Overview
-
Prep Time: 10 minutes
-
Cooking Time: 25 minutes
-
Total Time: 35 minutes
-
Yield: 9 large biscuits
-
Serving Size: 1 biscuit
Nutrition Table Per Serving
| Nutrient | Amount Per Serving | Daily Value Percentage |
| Calories | 260 kcal | 13 percent |
| Total Fat | 12 grams | 15 percent |
| Saturated Fat | 7 grams | 35 percent |
| Trans Fat | 0 grams | 0 percent |
| Cholesterol | 30 milligrams | 10 percent |
| Sodium | 480 milligrams | 21 percent |
| Total Carbohydrates | 32 grams | 12 percent |
| Dietary Fiber | 1 gram | 4 percent |
| Total Sugars | 3 grams | 6 percent |
| Protein | 5 grams | 10 percent |
| Calcium | 140 milligrams | 11 percent |
| Iron | 1.8 milligrams | 10 percent |
| Potassium | 110 milligrams | 2 percent |
Final Thoughts
Baking delicious, mouthwatering food at home does not need to be complicated, messy, or time consuming. Butter Swim Biscuits prove that with just a few basic ingredients and a few simple steps, you can create a truly memorable meal that brings warmth and comfort to your dinner table. Whether you serve them alongside a piping hot bowl of soup on a chilly winter evening, share them with family during a relaxed weekend brunch, or enjoy one warm with a drizzle of sweet honey as an afternoon treat, these golden delights are guaranteed to satisfy every single time. Give this effortless recipe a try in your kitchen today, and do not be surprised if it quickly becomes one of your all time favorite go to recipes for years to come.
Disclaimer
The nutritional information provided in this article is meant for general educational and informational purposes only. Everyone’s body, health needs, and dietary requirements are completely different, meaning individual health outcomes and nutritional processing will vary from person to person. Actual nutrition values can change depending on ingredient brands, exact measurements, and individual portion sizes. If you have specific dietary restrictions, food allergies, or underlying medical conditions, please consult with a qualified healthcare professional or certified dietitian before making significant changes to your regular meal routine.